ToothPaste.nodes
ToothPasteMotion.nodes
downloads:
download ToothPaste.nodes, download ToothPasteMotion.nodes, download Demo Scene
Version Compatability
These nodal network were developed in Lightwave 2019, and work in Lightwave 2018 and later. they will not work in lightwave 2015 or earlier without major modifications.
If you find my tools useful please consider paying a little something for them, thanks!
What do they do?
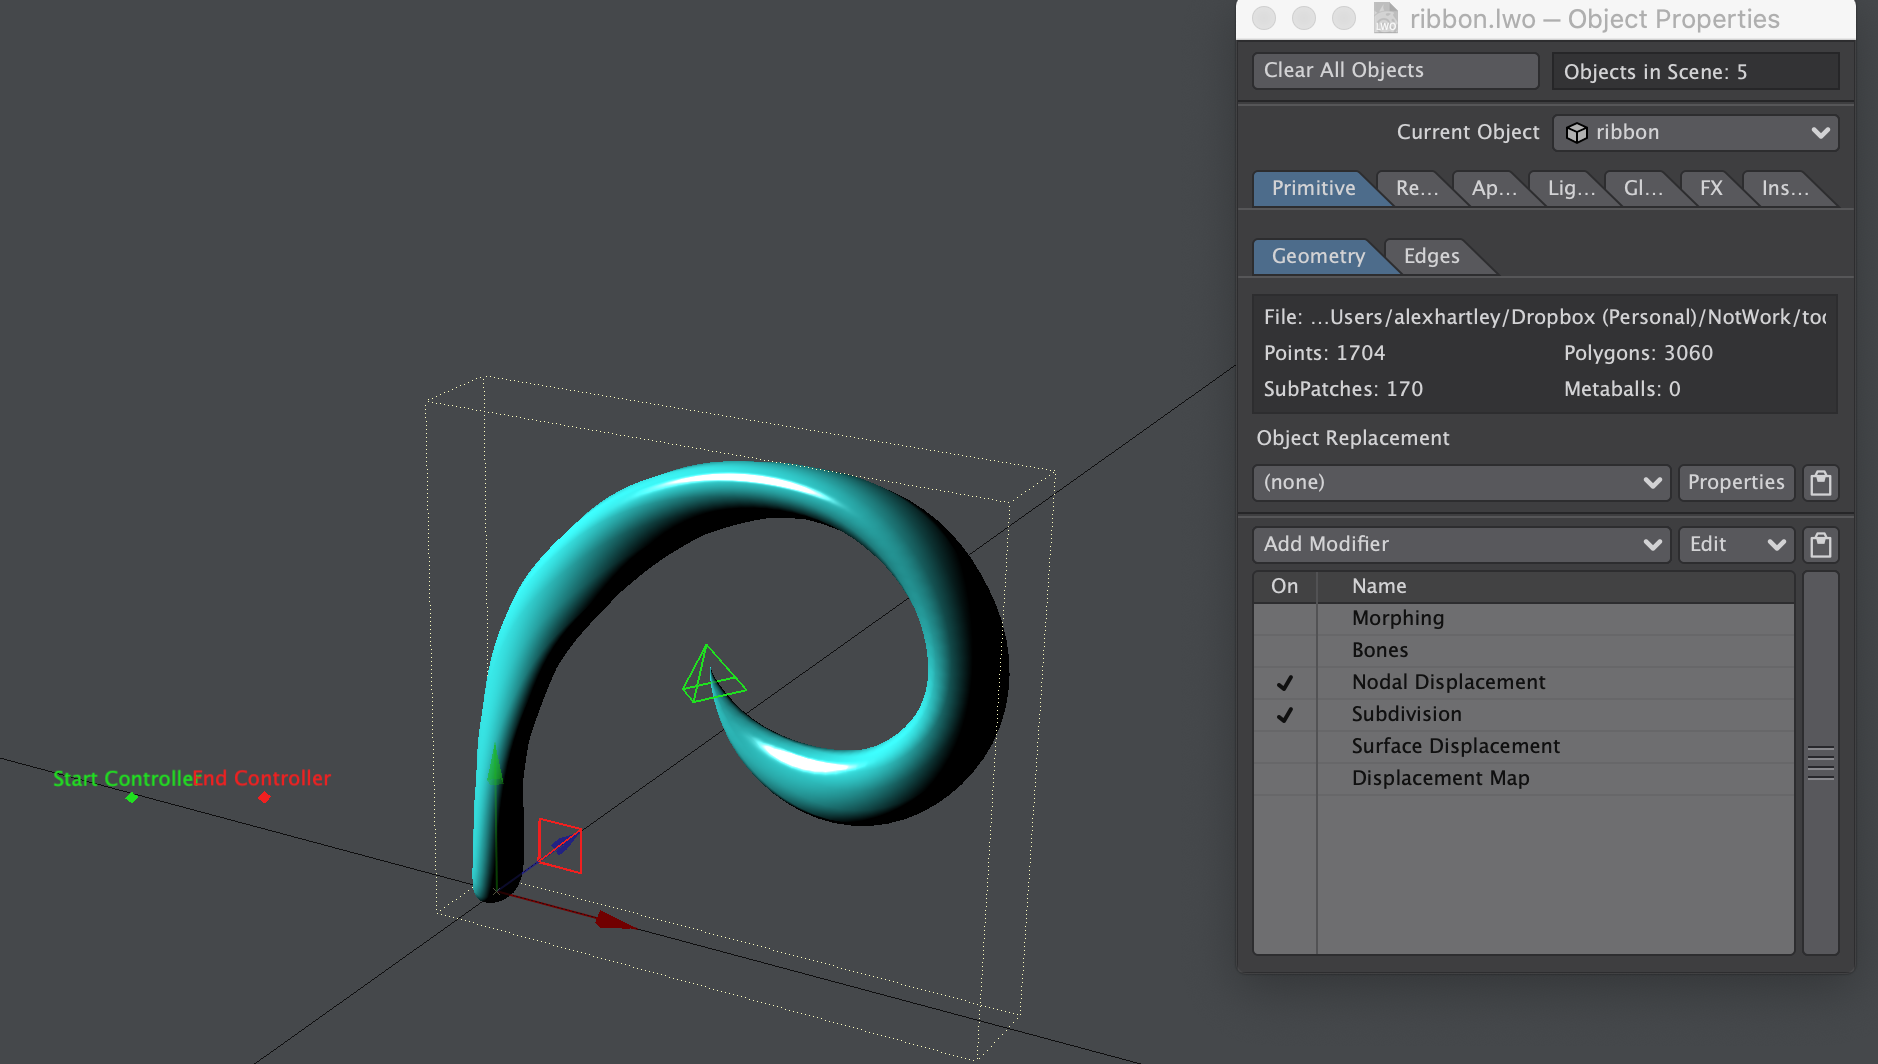
 In this gif the mesh has ToothPaste.nodes applied and the pyramid shaped nulls have ToothPasteMotion.nodes applied. only the two nulls labeled "controller" are keyframed. This gif is from the Demo Scene
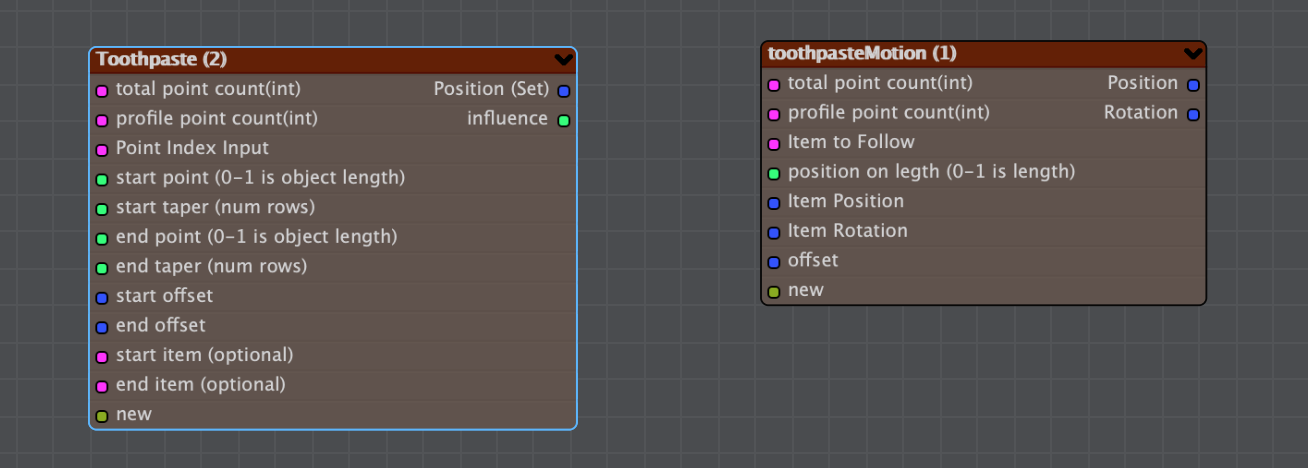
ToothPaste.nodes is similar to LimitSlide.nodes but... gooier. You can use it as a displacement to grow a tube like object along its length with the addition of softly tapered edges like toothpaste, hence the name. It features adjustable the taper, and the toothpaste can be extruded from either end or both at once. It works by gradually collapsing all of the edgeloops beyond a defined limit into a single point. By default it will place that point more or less at the center of the defined limit, but it provides options to offset the poistion or chose an entirely different location to collapse the points.
ToothPasteMotion.nodes is a companion motion modifier that allows you to move an object along a tube, adjusting both the postion and rotation to follow the position and orientation of each edgeloop. You can use this to make an object seem to extrude a mesh to which toothpaste.nodes is applied. It will automatically blend between a position on the mesh and a keyframed position when it reaches the end of the mesh.
How To Use These Compound Nodes
For reference please download the example scene.
Importing the Node Networks
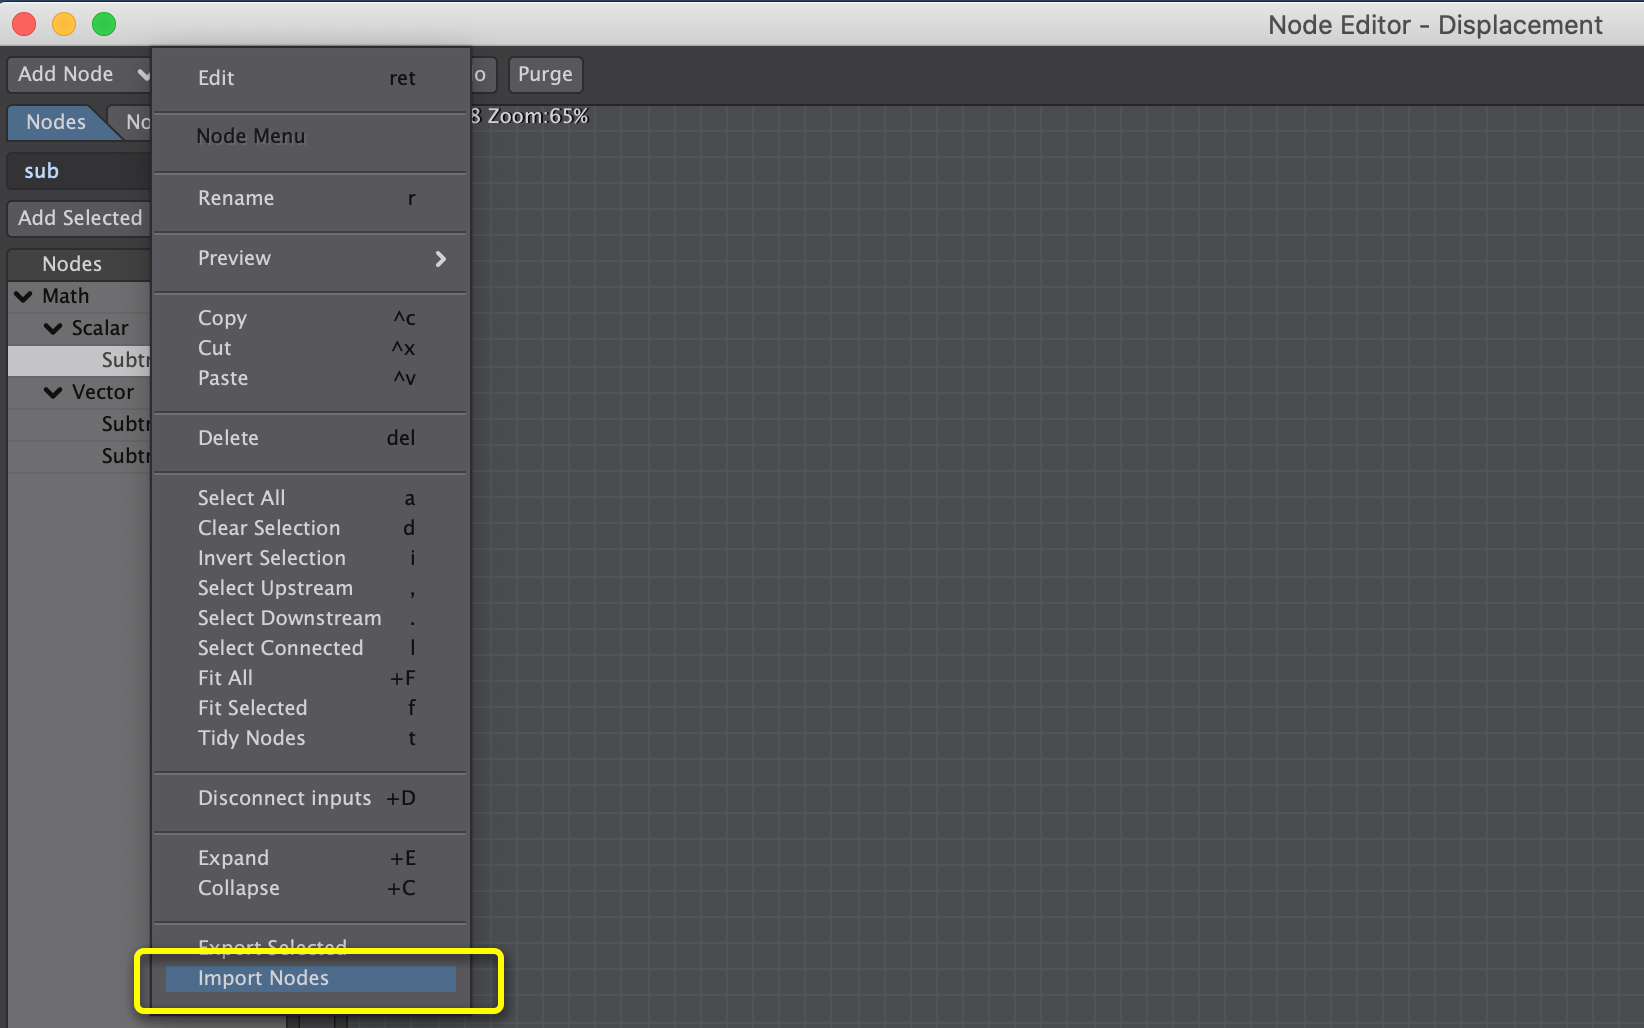
First, import ToothPaste.nodes by clicking on the edit dropdown in the nodal displacement window. If you are on a PC it might not display the ".nodes" files in your file selector, but just set it to show all files. Lightwave on pc uses ".nod" files whereas on Mac it uses ".nodes". It doesn't matter though ".nodes" files work just fine on PC.
for ToothPasteMotion.nodes you should import it in the Nodal Motion Editor.
Making The Right Sort of Object
These nodes rely on point order. You need a tube that has a constant number of points in its profile, and the point order needs to ascend edgeloop by edgeloop from one end of the tube to the other. The easiest way to do this is to use one of modeler's extrude tools such as such as extrude, rail extrude, magic bevel, multishift etc. or to simply create the object with the number of sections you want from the start. YOU MUST NOT do any modeling operations that add points in the middle of the tube after you have extruded out a shape -any subdivision basically. If you do that you will ruin your point order. You can only add new points at the end of the tube. You also cannot create branches off of your main tube. You can check the point order by pressing the "i" key in modeler to open the info panel, select two adjacent point along the shape and tap the right arrow key to select the entire row. Tap the "Edit All" button in the the info panel and it will show you the point numbers in the viewport.
any modifications that do not add points are fine, you can delete edgeloop, or move points as much as you want. you can also add polygons using existing points, so you can add caps to close up holes and stuff.
Good Point Order
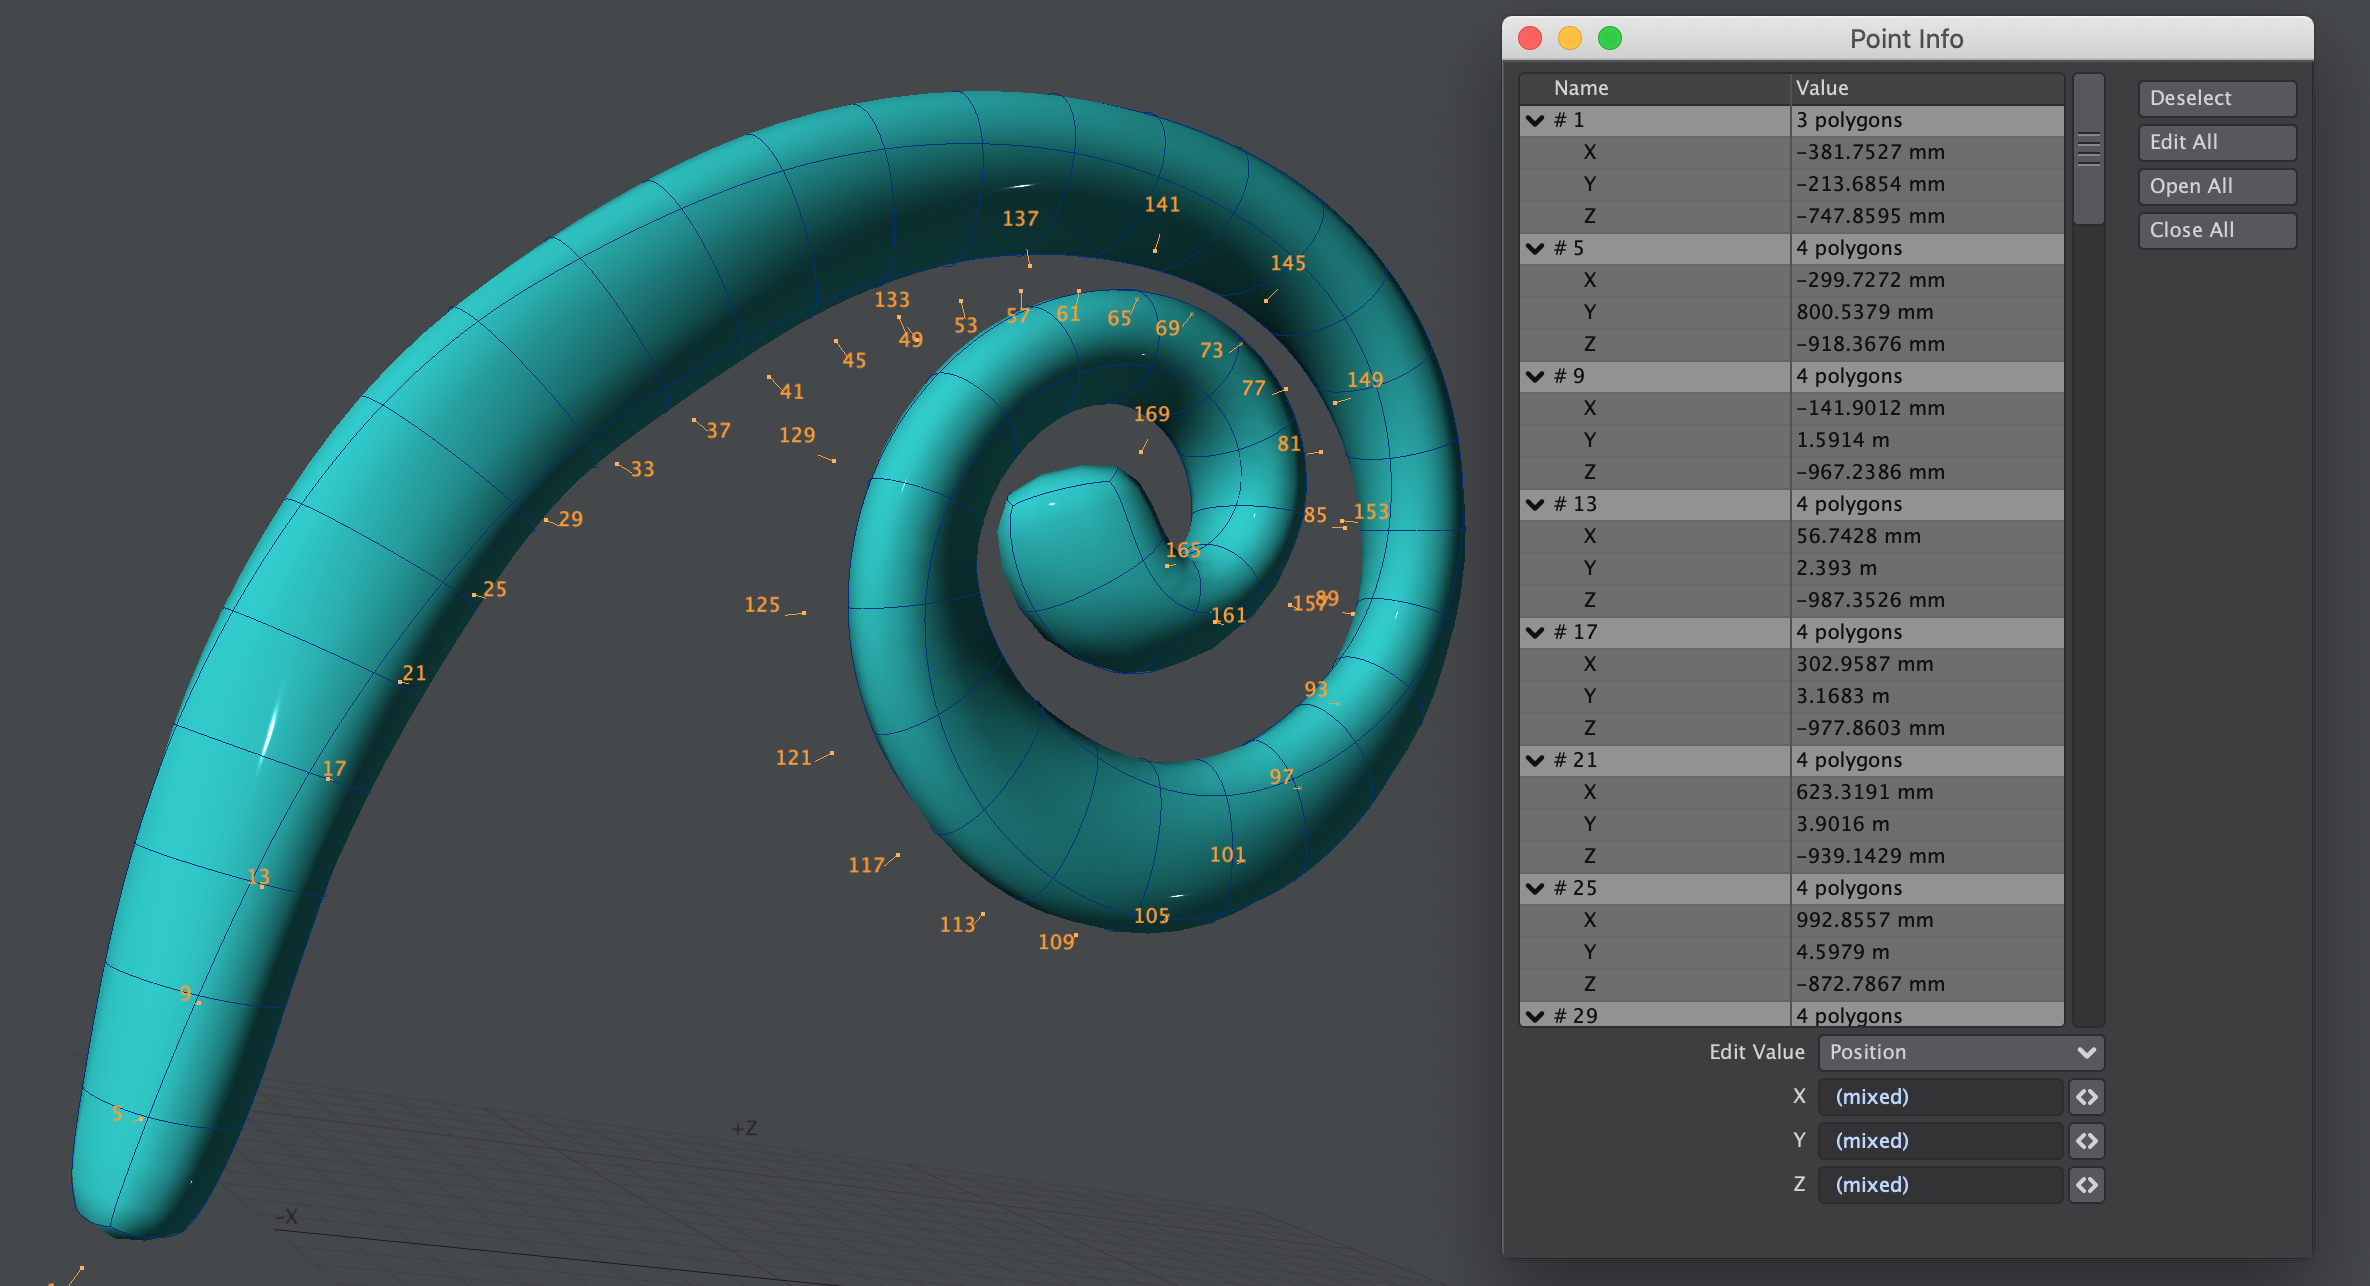
If they are ascending in multiples equal to the number of points in the profile like in the image above you are probably all set. To be 100% sure you would need to check all the points, but it is very unlikely that you would manage to get a point order like this on one row, and not on the others.
ToothPaste.nodes
The following section describes setting up the toothpaste.nodes Nodal displacement on your tube.
Connecting the ToothPaste.nodes Compound node
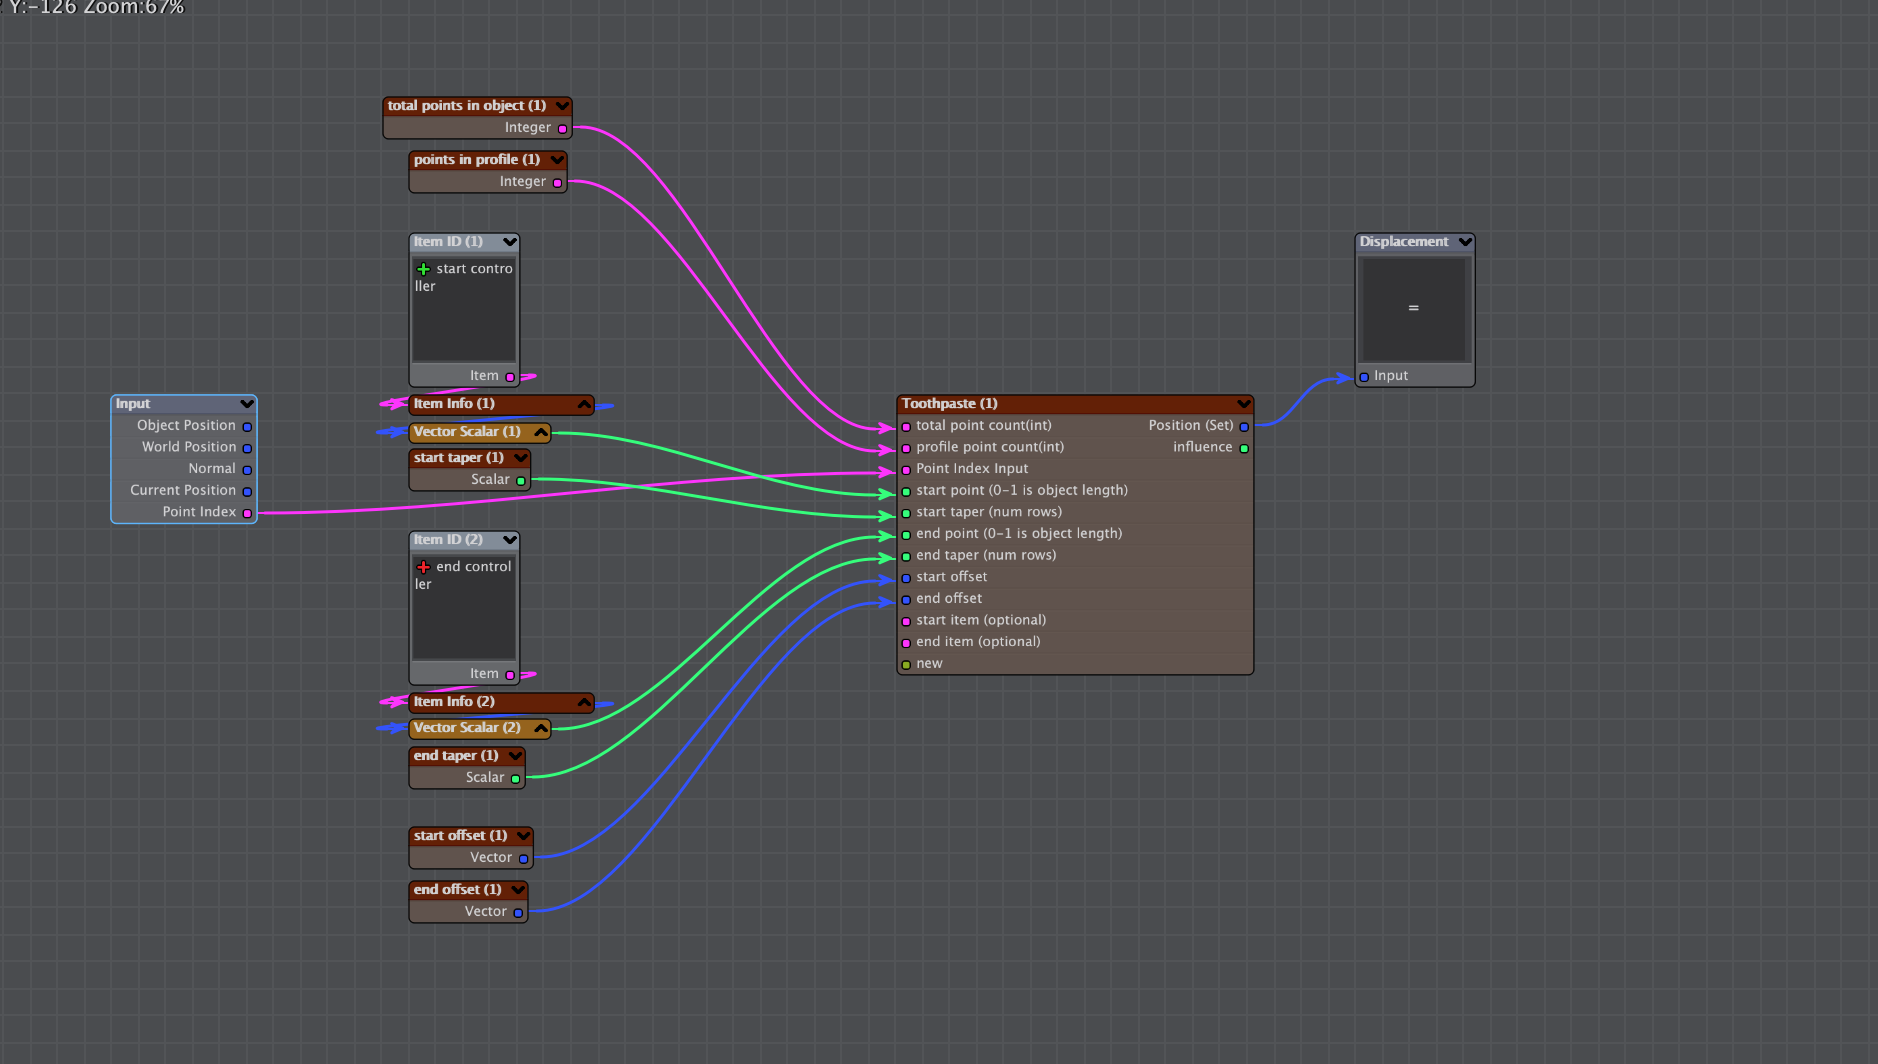
Connect the point index output of the nodal displacemnt input to the point index input of the compound node. Then you must assign the following
-
Define the number of points in the mesh (unsubdivided). You can check this in the statistics panel "w" in modeler.
-
Define Number of points in the profile (each edgeloop) of the mesh.
-
Assign a scalar to the start and/or end points. When imported the node will be set up with some extra nodes to use the Y position of nulls the controllers, but any scalar will do, so you can use a procedural or any scalar output. The length of the tube is Between 0-1.
-
Assign a scalar to the start and/or end taper. This tells you how long it should take for the shape to reach full thickness. This number represents the number of loops. You should not set it to lower than 2 because you may get some strange deformations and popping.
-
Assign offsets(optional). You can use a vector to offset the start point in space. This is useful if you want to give the impression of the toothpaste "dropping" from a nozzle for example.
-
Assign start and end objects (optional). If you connect an item ID node here the tube will grow from an object position instead od the position calculated by the nodes. This can be useful if you want to create something that looks a little like soft serve ice cream. If you do not plug any thing into these inputs they will be ignored.
-
Finally you must set the displacement mode to "Set".
Displacement Order for ToothPaste.nodes
You should have the nodal displacement before Subdivision. if you want to be able to deform the mesh with bones the displacment should be before bones as well. You must also set the bones to "Full Bones (morphed Positions)"
ToothPasteMotion.nodes
The following section describes setting up the nodal motion on another object that will follow the shape of your tube. Add a nodal motion modifier import the compound node and follow the following steps to connect and set it up.
Connecting the ToothPasteMotion.nodes Compound node
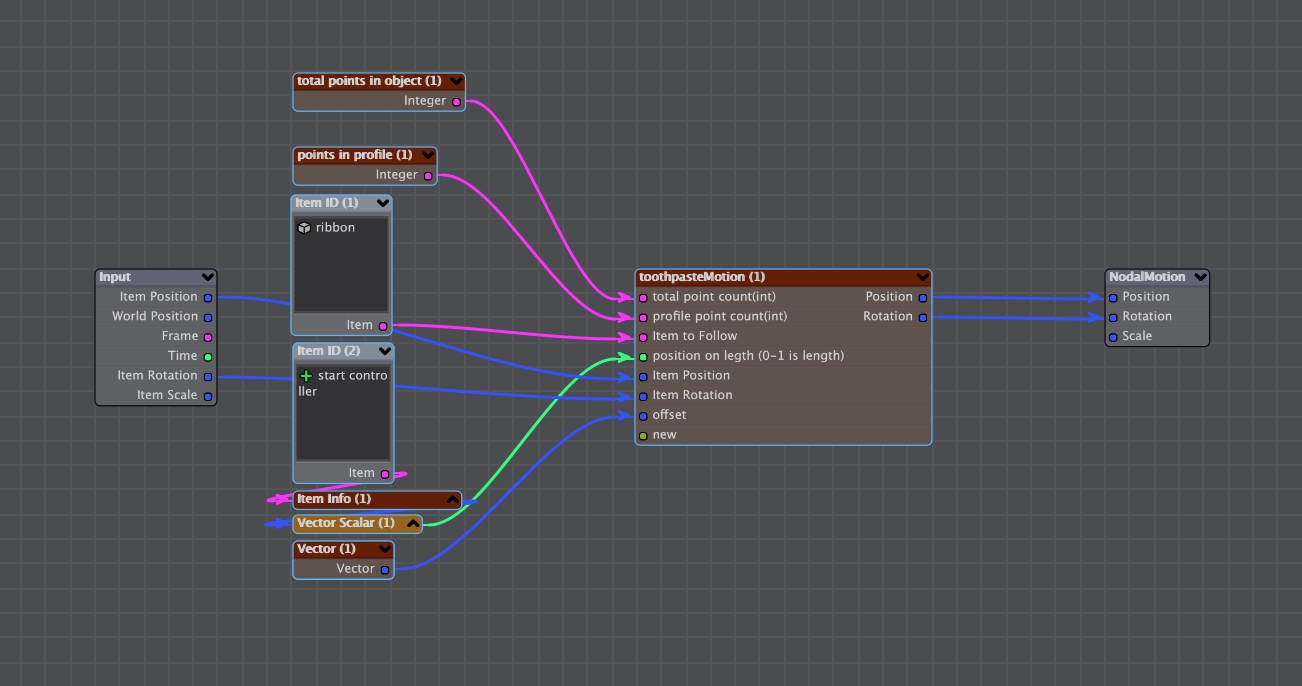
When you import this compound it will have a number of connections already set up.
-
first you must assign the "tube" that you want the nodal motion to analyse, then you must set the
-
Define the number of points in the tube (unsubdivided). You can check this in the statistics panel "w" in modeler.
-
Define Number of points in the profile (each edgeloop) of the tube.
-
Define the Position on the tube. When imported this will be set up to use a null as a controller. You can use the same controller you use for ToothPaste.nodes if you want, but any scalar will do. When the value of this scalar is between 0 and 1 it will define a position and rotation in the tube. between 0 to -0.1 and 1 to 1.1 the nodal motion will gradually release control of the motion. So if the scalar value you input here moves from -1 to 2 the item will start in its keyframed position and rotation then move smoothly to the start of the tube, follow the length of the tube and then move smoothly back to its keyframed position and rotation.
-
Define an offset vector (optional). You can set up an offset just like toothpaste.nodes.
-
Plug the Item Postion and Item Rotation outputs of the input node into the corresponding inputs of the compound node.
-
Connect the Position and rotation outputs of the compound node to the Position and Rotation outputs.